Wednesday, April 25, 2018

How to add project level Preprocessor Definitions to a C# project

Using GUI


  1. Open the project in Visual Studio
  2. Right-Click on the project file in the solution explorer go to properties
  3. Go to Build tab and Make sure you select the All Configurations in the configuration drop down
  4. Make sure selected the All Platforms in Platform drop-down
  5. Type the Preprocessor Definitions you want in the Conditional Compilation Symbols text box separated by semicolon


Directly in to Project file


  1. Open the project file in a Text Editor 
  2. Copy and paste this code to end of existing PropertyGroup
  3.     <PropertyGroup Condition="'$(VariableName)'=='VarableValue'"> <DefineConstants>PDEF1;PDEF2;PDEF3</DefineConstants> </PropertyGroup>
  4. If you not required to add a condition, delete the Condition="'$(VariableName)'=='VarableValue'" part
  5. Save the project file and open from Visual Studio

Wednesday, May 04, 2016

How to clean and reset Jenkins build history

When you working with Jenkins while building your solution, definitely you have to run your project multiple times. It will result to a long Build History list that looks ugly and unnecessary for your production environment.

 If you need to clean this Build History, and reset the build number, you can run a simple script in  Jenkins Script Console. Here are the steps to do so.

1. Go to `Jenkins Script Console`
Go to your Jenkins home page > Manage Jenkins > Script Console


2. Run the script to clean and reset

Copy and paste this script to your Console Script text area and change the "copy_folder" to project name that you need to clean the history. Then click the "Run button".


def jobName = "copy_folder"
def job = Jenkins.instance.getItem(jobName)
job.getBuilds().each { it.delete() }
job.nextBuildNumber = 1
job.save()

Now check your Build History for the particular project, Wow!, it's clean now!

Thursday, March 10, 2016

How to setup RAID 0 with SSD, Step by step giude

As you know in the computer hardware world reading and writing to the storage disk is the bottleneck for the data transfer. Even though processors an memory chips getting faster and faster, Hard disk reading and writing technologies did not meet the requirement that industry expected.  But, recently after SSD (Solid State Drive) reached to the market, Users got quite comfort because of the data read and write speed if they ignore the risk of lost data.

You may need more and more speed to read and write data to the storage because of these kind of  applications.
  • Compile large source code base
  • Video editing & rendering
  • Working with large CAD files or plans
  • Search in large set of data (Big Data)
  • Search in large databases (Geographical Map Data)
  • Playing Computer Games
  If so best solution for you is setting up RAID 0 with multiple SSDs. So here is the step by step guide how to setup "RAID 0" with two SSDs.


1.  Backup all the data in your computer and you might need to reinstall the OS.

After setting the RAID all of the data in SSD will lost. So if you need the data in SSDs please backup all of those.  By right other drivers should not affect by setting RAID on newly added SSDs. But in my case my Windows 10 OS corrupted after setting RAID. So be prepare or trust the God. I suggest you to back up all the things in the Desktop, bookmarks etc..


2.  Prepare the necessary hardware.
  • Your motherboard should support to configure RAID (Check motherboard details or BIOS setting) and should have two free SATA slots.
  • Two (or more) SSDs with same capacity (In my case I have two 1TB SSDs)

  • Two SATA cables to connect SSD to mother board

  • SATA power cable splitters(T cable) in case if your casing doesn't have extra two power slots. (In my case, casing has one extra power slot, So I bought one splitter)

3.  Connect the SSD to motherboard.
Connect the two SSDs to the motherboard using two SATA cable and power splitter. If you have more than two SSDs, Those must be same capacity and connect all SSDs to the motherboard. Usually SATA cable in motherboard named like STA1, SATA2, STA3 etc.. But if you can see some other names, You should give priority to port named with SATA1,SATA2 etc... I have tried other ports. even though the cable can be plug, SSDs ware not recognize by the motherboard. Make sure to provide power to the SSDs.


4.  Turn on RAID from BIOS.
Turn on the computer and go in to BIOS setting by pressing the necessary key. Find how to turn on the RAID feature. Different BIOS interfaces giving different way to turn on the RAID feature. In my case I'm using Dell Tower workstation. So Here is how I turn on the RAID feature using BIOS interface.


5. Create RAID 0 using RAID Interface

 5.1.
After RAID feature on, Save and exit from the BIOS the your computer will restart and it will show up a new interface line this.

5.2.
It is asking to go press CTRL+I keys to go to RAID setup interface. So please press control and I keys together. Then it will forward you to a this kind of interface.


5.3. 
This is RAID setup interface. Use the arrow keys in the keyboard and select Create RAID Volume and press Enter. This you will see this screen.


5.4. 
This is the RAID Volume setting interface. Type a suitable name (I typed Voloume0), Select RAID0 as RAID Level, Keep other things as default. In my case above screen shows the settings I have choose. Use arrow key and go to Create Volume, then press Enter. Then you can see this screen.


5.5.
This interface allow you to select what the the SSDs you choose to include in to the new RAID0 drive named "Voloum0" In my case I have selected my newly added two 1TB Samsung SSDs. I have one more 256GB space SSD, that uses to install the operating system. And also a hard drive I uses to store data before buying SSDs. You can use space bar to select the SSDs and press Enter after selecting.


5.6.
Then it will ask your confirmation. Press Enter to Confirm and then exit from the RAID setting interface by confirming below dialog..


 6. Restart the computer and enjoy lightning faster data read and write.
After exit, it will restart the computer automatically, Even though it shows the RAID setup enter interface we saw in 5.1 don't do anything this time. If you are lucky, your computer will boot without issue. otherwise you have to reinstall the operating system. In my case I had to install Operating system again.
 After boot the computer, Right click on the My computer (ThisPC in Windows 10) > Go to "Manage" > Go to "Disk Management" Then you can see the new drive as a new one disk. Im my case I have 1769.77 GB one disk. You can this this is just a hard drive and create partition as you like from this space.

In my case I will create two partitions as shown in below image.


Saturday, December 26, 2015

How to Install Broadcom drivers in Fedora 22/23


You may face issues while accessing internet via Wifi after installing fedora 22 or 23. Basically issue could be the Linux default chip-set drivers not support Broadcom chip-set. So we have to install correct drivers from the vendor to fix this issue.


Symptoms
  • Wifi was working fine. But after updating fedora, Wifi does not work
  • Wifi not works at all. But wired connection works fine.
  • Wifi works, but after sometime, data rate starts to decrease and finally connection terminates.
  • Wifi suddenly disconnects, But If I manually connect again, everything works fine for a short time.
 If you facing any of these issue, this article is for you. Here is the steps how to install Broad-com chip-set drivers.

1. First you have to verify your wireless card is Broadcom. So run this command as super user.
lspci | grep -i broadcom
Expected outcome something like
12:00.0 Network controller: Broadcom Corporation BCM4313 802.11bgn Wireless Network Adapter (rev 01)

If you are not getting any result that means your wireless card is not Broadcome and you have to stop reading this article.

2.You have to use 3G dongle or Wired connections to connect to the internet.

3. Install RPMFusions free and non free versions using these two commands. Change version number (22) according to your version. My installed fedora version is 22.

rpmkeys --import "http://rpmfusion.org/keys?action=AttachFile&do=get&target=RPM-GPG-KEY-rpmfusion-free-fedora-22" "http://rpmfusion.org/keys?action=AttachFile&do=get&target=RPM-GPG-KEY-rpmfusion-nonfree-fedora-22"

Then
dnf install http://download1.rpmfusion.org/free/fedora/rpmfusion-free-release-22.noarch.rpm http://download1.rpmfusion.org/nonfree/fedora/rpmfusion-nonfree-release-22.noarch.rpm


4. Now your *.rpms are ready. Lets continue to install the drivers. Run below command to install the necessary packages.
 dnf install kmod-wl akmod.wl kernel-devel
You may get some error message like
No package akmod.wl available.
No package kernel-devel available.
If so, Search the akmod.wl packages available using this this command
dnf list "*-wl"
Then find the exact name from the search result. In my case exact name is akmod-wl.x86_64. So install the package using exact name
dnf install akmod-wl.x86_64
For kernal_devel search using this command
dnf lnstall "*kernel*"
Then find the exact name from the search result list. In my case exact name is  kernel-devel.x86_64. Install the package using this command.
dnf install kernel-devel.x86_64

5. Now restart the computer using reboot command.
6. Enjoy the wireless internet.

Monday, November 02, 2015


1. Type "turn windows feature on or off" in the search box in the task bar


2. Select the "Turn Windows feature on or off" that appears in the best match list. Then it will open up below window.


3. Check the first entry ".NET Framework 3.5 (Include .NET 2.0 and 3.0 )"  and click "OK" button. Then you will see below window.


4. Select "Download files from Windows Update". It will start to search in the internet and try download the .NET framework 3.5, If everything working correctly.

But most of the times, Download process end up with this error.


5. So Simply it means, system not capable to install .NET 3.5 from the internet. But we cant give up. Then let's install .NET framework 3.5 from  installation DVD or ISO file.

If you have installation DVD just insert it in to DVD drive. Otherwise, you have to follow the steps form 6 to 11. Users who has installation DVD, Please directly go to the step 12.

6. Go in to this URL https://www.microsoft.com/en-us/software-download/windows10  .You can see two buttons in the web page like this image. Use one of the button and download the ISO file, either 64 bit or 32 bit depends on your system.


7. Now you have to download and install some 3rd party tool to open the ISO file downloaded in above step. So lets install "Virtual Clone Drive "

Go to  this URL http://www.slysoft.com/en/download.html and download "Virtual Clone Drive (Freeware)"


8. Double click the downloaded file and Install the "Virtual Clone Drive". While installing, it will pop up a dialog and ask permission to install device drivers. Click 'Install"


9. After installation complete, click "Close button"


10. Now, right click on the ISO file you have downloaded in the Step 5 and go to "Open With" then you can see "Mount Files with Virtual CloneDrive". Click on that.


11. Now open the "This PC" and you can see new driver appears there. In this case, drive latter is "E". In your computer drive latter can be different. Anyway, remember the driver latter. In my case I will remember "E"


12. Go to search box in the task bar again, and type "cmd", then you will see "Command prompt" in the best match list. right click on the command prompt and select ''Run as administrator"


13. Then type this command in the command prompt and change latter "D" to the latter you have remember in last step. Users who use Installation DVD, Just use the DVD drive latter.
Dism /online /enable-feature /featurename:NetFX3 /All /Source:D:\sources\sxs /LimitAccess
If .NET framework installed successfully, you can see this output in the command prompt.


14. If your command prompt hang without any response, It means Some windows updates are installing is in progress. So wait some time, restart the computer and try again.

15. Now go back to "Turn Windows feature on or off" window. Now, you can see .NET framework 3.5 is installed.


16. You have done it. have a rest with a cold beer :)

Sunday, July 27, 2014

How to fix curl: (6) Could not resolve host in Fedora

After you installed Fedora, you may face this issue while updating the system or a any specific application. Any also while try to install new application using Terminal. There are few things you have to do to fedora before you start to work otherwise it will trouble you always.


Today I'm going to treat for these symptoms
1. curl: (6) Could not resolve host
2. curl: (6) Could not resolve host: google.com; Name or service not known
3. nolookup not working
4. Firefox doesn't have internet
5. Couldn't resolve host when installing/updating yum packages
6. Very Slow DNS Lookup
7. Very slow to load web pages in web browser.

Here is the step by step solution.

1. Most of the issues occur because of the IPV6 internet connection in the Fedora. So first we have to disable IPV6 totally. here what you have to do


  • Open Terminal
  • Type su and enter to log in as the super user
  • Enter the root password
  • Type cd /etc/modprobe.d/ to change directory to /etc/modprobe.d/
  • Type vi disableipv6.conf to create a new file there
  • Press Esc + i for insert data to file
  • Type install ipv6 /bin/true on the file to avoid loading IPV6 related modules
  • Type Esc + : and then wq for save and exit
  • Type reboot to restart fedora
  • After reboot open terminal and type lsmod | grep ipv6 
  • If no result, it means you properly disabled IPV6
2. Then you have to disable the IPV6 DNS look-up in your Firefox browser. For that you have to go true one of my step by step tutorial. below I mention the link. But remember to comeback here to continue rest of the tasks.


3. Now your Firefox ready t surf internet but one more issue there. Fedora may user your ADSL router or Modem as the DNS server. In other way Fedora may uses some less powerful DNS server for look-up. So  your DNS look-up will be slow and wrong most of the time. This will cause to Curl errors and slow loading errors. So we have to set some powerful DNS server for look-up purpose in Fedora. Here is the steps.

  • Open Terminal
  • Type su and enter to log in as the super user
  • Enter the root password
  • Type cat /etc/resolv.conf to check what DNS server your Fedora using. Mostly this will be your Modem IP address.
  • Now we have to Find a powerful DNS server. Luckily there is a open DNS server maintain by Google.
  • Go to this page and find out what are the "Google Public DNS IP addresses"
  • Today those are 8.8.8.8 and 8.8.4.4. But in future those may change.
  • Type vi /etc/resolv.conf to edit the resolv.conf file
  • Press Esc + i for insert data to file
  • Comment all the things in the file by inserting # at the begin of the each line. Do not delete anything because can be useful in future.
  • Type below two lines in the file

nameserver 8.8.8.8
nameserver 8.8.4.4

  • Type Esc + : and then wq for save and exit
  • Now you are done and everything works fine (Not necessary to restart).
  • But every time when you restart the computer your  /etc/resolv.conf will be replaced by default. So I'm let you find a way to avoid that. 

Monday, March 17, 2014

How to use Eclipse with Fiddler step by step (for JAVA)

Background:

Eclipse is a nice IDE that popular among JAVA programmers. Recently I have involve with few java base project and that mostly with notwork programming stuff such as HTTP request sending, POST submit, GET request. I used my favorite http/https traffic recording tool "Fiddelr" to use with Eclipse.

So here is the my simple JAVA program that send a http post request to the server. Here I uses Apache HTTPClient (JAVA http implementation) for easy coding.

import java.io.IOException;
import org.apache.http.client.HttpClient;
import org.apache.http.client.methods.HttpPost;
import org.apache.http.HttpResponse;

public class HTTPRequest{

String base_url = "https://destination-server.com";

public static void main(String[] args) { 
 HttpClient wf_client = HttpClients();
 HttpGet get_request = new HttpGet(base_url);
 try {
  HttpResponse login_responce = wf_client.execute(get_request);  
 }catch (IOException e) {
  System.out.println(e);
 } 
}
}


Previously when I work with C++ network programming Visual Studion IDE. I could use Fiddler to capture http and https traffic without any extra configuration. But this time when I compile and run this program in Eclipse, Fiddler does not show any http traffic. So i had to spend few hours to figure out, how to use Eclipse with Fiddler.

Let's try step by step:

Step - 1:  Go to http://www.telerik.com/fiddler and click on [Free Download] button to download Fiddler and install in to your PC.

Step - 2: If you installed Fiddler properly, when you load a web page in your web browser, you can see the http and https traffic in the Fiddler window as below


 Step - 3: Go to Filter tab in the right side of the windows and add filter to show only traffic to your destination host. and click [Action] button to save


 Step - 4: click [Remove all] to clear up all the previous recorded traffic.


Step - 5: Then go in to Eclipse and build and run your program that sending HTTP requests to the remote host. If the Fiddler showing the request, no issue you can continue works. But if the Fiddler doesn't record the requests here is the way to figure-out.

Step - 6: For record the http/http request you have to send the request trough the Fiddler. So go to 'Tools' -> Fiddler Option -> 'Connection' tab and check the port specify there.


Step - 7: So here is my case, it's automatically configured to port 8888. After identifying the port your have to add your localhost and above port as proxy to your connection. look at the example below.

public static void main(String[] args) { 
 HttpHost proxy = new HttpHost("localhost", 8888);
 HttpClients wf_client = HttpClients.custom().setProxy(proxy).build();
 HttpGet get_request = new HttpGet(base_url);
 try {
  HttpResponse login_responce = wf_client.execute(get_request);  
 }catch (IOException e) {
  System.out.println(e);
 } 
}

Step - 8:If you sending just http requests now your fiddler works fine and you can see the sending and receiving requests and the details of those. But if you are sending https requests now your program shows this run-time error.


Unexpected errorjavax.net.ssl.SSLHandshakeException: sun.security.validator.ValidatorException: PKIX path building failed: sun.security.provider.certpath.SunCertPathBuilderException: unable to find valid certification path to requested target


Step - 9: To get rid from this exception go to 'Tools' -> 'Fiddler Options' -> 'Https' tab and click Export 'Root Certificate ti Desktop'


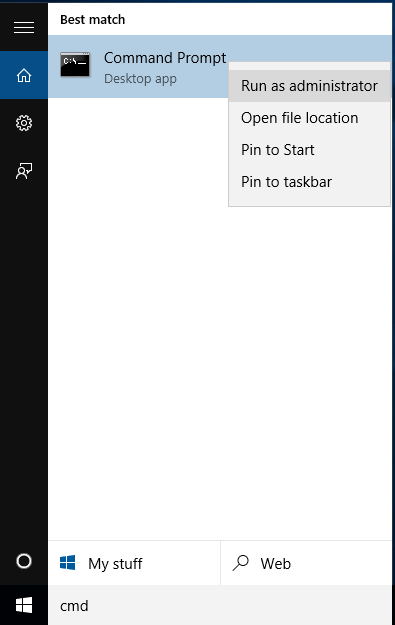
Step - 10: Now we have to install the exported certificate to JAVA. for that open 'command prompt' as administrator and run below command


C:\Windows\system32>keytool.exe -import -file [path the exported file] -keyst
ore [name for keystre] -alias [alias name for certificate]

As a example, In my PC command is like this

C:\Windows\system32>keytool.exe -import -file C:\Users\nayanaa\Desktop\FiddlerRoot.cer -keyst
ore FiddlerKeystore -alias Fiddler

Step - 11: Then the system will ask you to enter a password to access certificate. Please enter a whatever a password and confirm the password. Please be careful to remember entered password.


Step - 12: Then the system will ask are you trusting this certificate. enter 'Y' and press enter. Then it will show "certificate added successfully" message.


Step - 13:  Then go yo your 'Java Home' -> Jre[x] ->bin. There you can see a file named FiddlerKeystore. move that file to 'Java Home' ->  Jre[x] -> lib ->security


Step - 14:  Now you installed the certificate to use Fiddler as a proxy server for https requests. Simply now you can send https requests trough fiddler. for this you have to add two lines to your program to speciify truestore and truestore password. Here you have to specify the path to FiddlerKeystore file in  'Java Home' ->  Jre[x] -> lib ->security and the password you enter while installing the certificate.


public static void main(String[] args) { 
 System.setProperty("javax.net.ssl.trustStore", "C:\\Program Files (x86)\\Java\\jre7\\lib\\security\\FiddlerKeystore");
 System.setProperty("javax.net.ssl.trustStorePassword", "my#password");
 HttpHost proxy = new HttpHost("localhost", 8888);
 HttpClients wf_client = HttpClients.custom().setProxy(proxy).build();
 HttpGet get_request = new HttpGet(base_url);
 try {
  HttpResponse login_responce = wf_client.execute(get_request);  
 }catch (IOException e) {
  System.out.println(e);
 } 
}

Step - 15: Now everything completed. you can track and record all the http and https traffic sending by eclipse.

Saturday, January 11, 2014

No internet in the Firefox after installing Fedora 20

This is mostly because of the default IPV6 DNS enables of  the Firefox.
So you have to disable this if your service provider does not support IPV6 DNS.

1. Open Firefox and  type about:config in the address bar.


2. Press the [ I will be careful, I, Promise ]  button.


3. Type Network.dns in the search text box.


4. You will see network.dns.disableIPv6 entry in the searched list.

5. Double click on the above entry to change value column to True.

6. Restart the Firefox.

7. Now your internet is ready.

Friday, January 10, 2014

When you try to run follow two command there can be this error showing in the Terminal.

yum update
yum check-update

  1. First you check if the Network connection and Internet works fine.
  2. Run yum clean all command and try to clean the corrupted repository data 
  3. Try to run the command in the debug mode as below. The you can get the details error message. If it says some URL cannot be acess then try to access that URL from your web browser and check if the URL work URLGRABBER_DEBUG=1 yum update 
  4. If your network environment uses proxy, then check your Linux version configured with correct proxy.
  5. Check your system date is correct.

Tuesday, December 10, 2013

C# Encryption Decryption Class AES

Sometimes you may need to use encryption and decryption class in your C# project. Here is a simple class you can use for above purpose feel free to use it and feedback with improvement. This class use Advance Encryption Standers. and RijndaelManaged method.


/*******************************************************************
File:         Crypter.cs
Author:       Nayana Adassuriya
Description:  Uses to encrypt or decrypt any string by symettric way (AES,RijndaelManaged) 
Language:     C#
Limitations:  Encription key genaration hashes are hardcoded in the class. 
              If some one knows these hashes, they can crate programe to decript the encripted strings. 
Thread Safe:  no  
Extendable:   yes 
Platform Depend:   Windows,.NET 3.5
Project:           None
*******************************************************************/

using System;
using System.Collections.Generic;
using System.Linq;
using System.Text;
using System.Security.Cryptography;
using System.IO;

namespace StorageService
{
  internal class Crypter
  {
    //Data members
    private static byte[] m_salt = Encoding.ASCII.GetBytes("41fb5b5ae4d57c5ee528adb00e5e8e74");
    private static string m_encrypt_key = "200911381f7899d2482ab61fe8d15684469b17fc690";


    /************************************************************************
    Purpose :         This is the method uses to encrypt plan strings.
    Parameters :      plan_test: text that need to be encrypted
    Returns :         encrypted string
    Exception :       If any exception while getting values from xml, pass to the upper level
    Algorithm :       C# manage code
    Output :          None
    Notes :           User can encrypt multiple times recursively if more security needs. If that
                      need to decrypt same number of rounds accordingly
    *************************************************************************/
    internal static string aesEncrypt(string plan_test)
    {
      string output = null;
      RijndaelManaged aes_alg = null;
      try
      {
        Rfc2898DeriveBytes key = new Rfc2898DeriveBytes(m_encrypt_key, m_salt);
        aes_alg = new RijndaelManaged();
        aes_alg.Key = key.GetBytes(aes_alg.KeySize / 8);
        ICryptoTransform encryptor = aes_alg.CreateEncryptor(aes_alg.Key, aes_alg.IV);

        using (MemoryStream encrypt_ms = new MemoryStream())
        {
          encrypt_ms.Write(BitConverter.GetBytes(aes_alg.IV.Length), 0, sizeof(int));
          encrypt_ms.Write(aes_alg.IV, 0, aes_alg.IV.Length);
          using (CryptoStream encrypt_cs = new CryptoStream(encrypt_ms, encryptor, CryptoStreamMode.Write))
          {
            using (StreamWriter encrypt_sw = new StreamWriter(encrypt_cs))
            {
              encrypt_sw.Write(plan_test);
            }
          }
          output = Convert.ToBase64String(encrypt_ms.ToArray());
        }
      }
      catch (Exception e)
      {
        throw e;
      }
      finally
      {
        if (aes_alg != null)
        {
          aes_alg.Clear();
        }
      }
      return output;
    }

    /************************************************************************
    Purpose :         This is the method uses to decrypt the encrypted strings.
    Parameters :      cipher_text: decrypted string need to decrypt to plan text
    Returns :         Plan text after decrypted
    Exception :       If any exception while getting values from xml, pass to the upper level
    Algorithm :       C# manage code
    Output :          None
    Notes :           User can encrypt multiple times recursively if more security needs. If
                      that need to decrypt same number of rounds accordingly.
    *************************************************************************/
    internal static string aesDecrypt(string cipher_text)
    {
      RijndaelManaged aes_alg = null;
      string plain_text = null;
      try
      {
        Rfc2898DeriveBytes key = new Rfc2898DeriveBytes(m_encrypt_key, m_salt);
        byte[] bytes = Convert.FromBase64String(cipher_text);
        using (MemoryStream decrypt_ms = new MemoryStream(bytes))
        {
          aes_alg = new RijndaelManaged();
          aes_alg.Key = key.GetBytes(aes_alg.KeySize / 8);
          aes_alg.IV = ReadByteArray(decrypt_ms);

          ICryptoTransform decryptor = aes_alg.CreateDecryptor(aes_alg.Key, aes_alg.IV);
          using (CryptoStream decrypt_cs = new CryptoStream(decrypt_ms, decryptor, CryptoStreamMode.Read))
          {
            using (StreamReader decrypt_sr = new StreamReader(decrypt_cs))
              plain_text = decrypt_sr.ReadToEnd();
          }
        }
      }
      catch (Exception e)
      {
        throw e;
      }
      finally
      {
        if (aes_alg != null)
          aes_alg.Clear();
      }
      return plain_text;
    }

    /************************************************************************
    Purpose :         Use to read first few bytes from cipher string( this helps to generate
                      the same key used in encrypt method again) 
    Parameters :      stream: stream that use to read the cipher text bytes from memory.
    Returns :         return byte array filled with first few bytes of the cipher string.
    Exception :       If any exception while getting values from xml, pass to the upper level
    Algorithm :       C# manage code
    Output :          None
    Notes :           None
    *************************************************************************/
    private static byte[] ReadByteArray(Stream stream)
    {
      byte[] buffer;
      byte[] row_length = new byte[sizeof(int)];
      try
      {
        if (stream.Read(row_length, 0, row_length.Length) != row_length.Length)
        {
          throw new SystemException("encrypted string not contain properly formatted byte array");
        }
        int temp = BitConverter.ToInt32(row_length, 0);
        buffer = new byte[temp];

        if (stream.Read(buffer, 0, buffer.Length) != buffer.Length)
        {
          throw new SystemException("Did not read encrypted string properly");
        }
      }
      catch (Exception e)
      {
        throw e;
      }
      return buffer;
    }
  }
}